4 uncommon planche strategies & the best planche progression
The planche is a cool skill and a great way to strengthen your shoulders, core, biceps - almost everything! And to do it, you don’t need any equipment. As with several of the movements we talk about here, though, it is cool in large part because it is so difficult. While some might be able to perform this movement within a year, others might spend years working on the planche. How your planche journey works out may be more or less difficult depending on your unique situation and body type, which we will get into in this article. As well, in this article I will go over what I call The Lost Planche Progressions. In particular, we will go over how to create half-steps between progressions - to break down the large jumps between progressions that leave many stagnating in their progress towards a full planche. I will also be going through some specific exercises you should focus on that will expedite your planche and overall calisthenics progress. Let’s get into it!
Check out the full video tutorial on the planche to learn how to get from tuck planche to full planche in a more detailed and stepwise manner than the traditional approach to the planche.
What body proportions make the planche difficult, or easy?
One thing that will make the planche easier for some, and more difficult for others, are some factors relating to your body proportions. Namely: your total body weight which will make it harder, the length of your arms compared to your body, aka the ape factor, and how large/heavy your lower body is.
This might feel counterintuitive at first, but for the planche: the longer your arms are compared to your body, the easier the planche will be.
The longer your arms are compared to your body, the less the angle there is between your arms and your torso, and that will make it easier. Partly due to the higher momentum this imposes on the relevant muscles in the shoulder and partly because these relevant muscles gets weaker as muscles and tendons extend.
If you have a larger/heavier lower body, you will need to lean further forward to keep your center of gravity above your hands (needed to hold a planche), and this will also make the planche more difficult with the same reasoning as above.
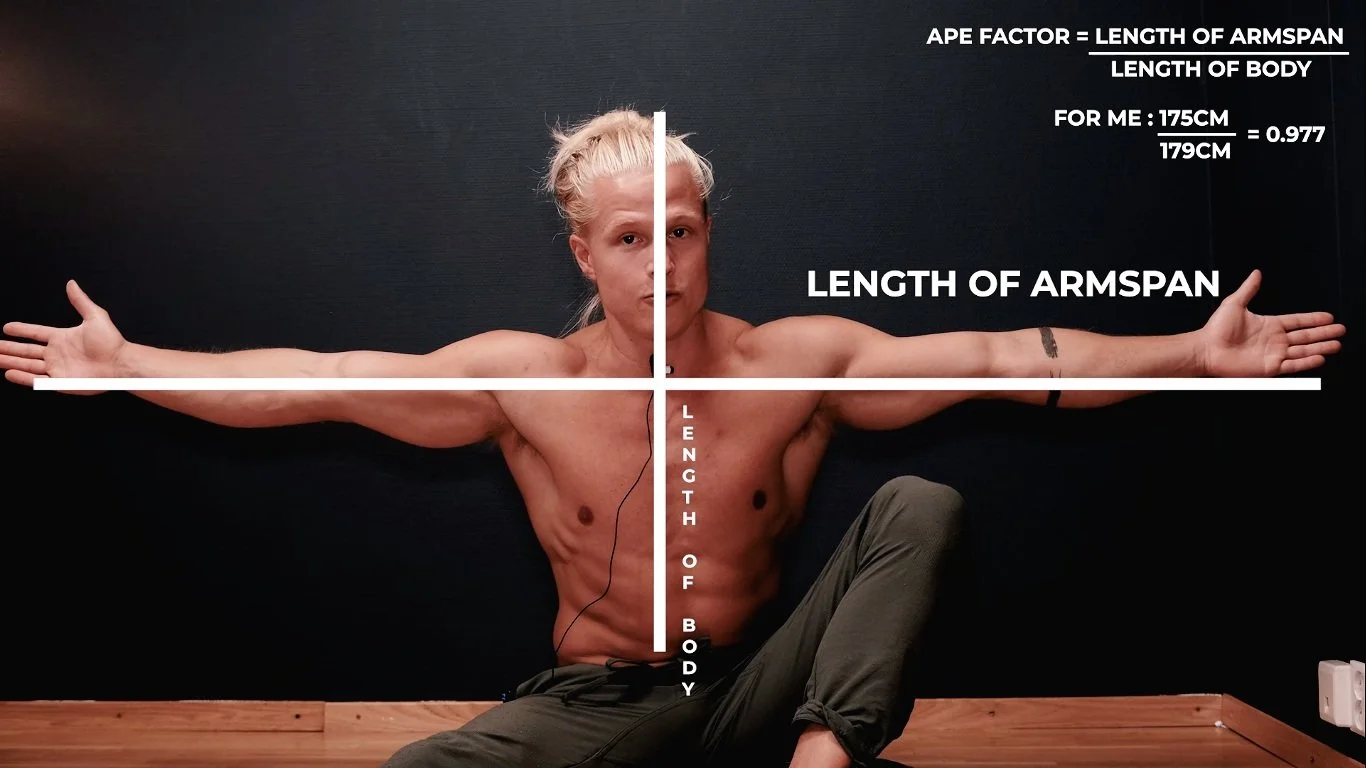
Ape factor - If you want the planche to get easy, make sure to grow your arms long. This is of course not possible, but you can use shoulder/scapula/spine positioning to get effectively longer arms.
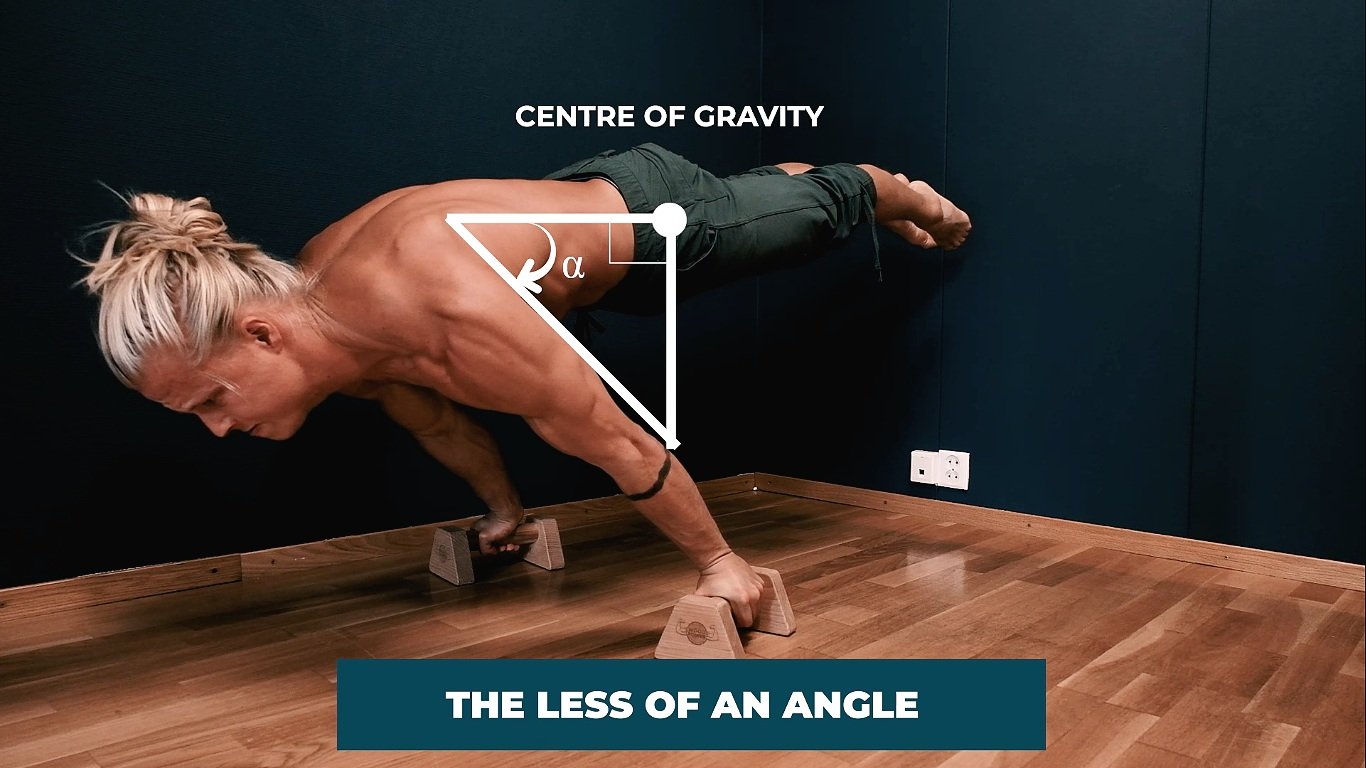
The angle between the torso and arms (reflected by the amount of lean) is increased if arms are short and/or lower body heavy - making the planche more difficult
1. The Lost Planche Progressions
Now I’m going to get into what I call The Lost Planche Progressions.
If you first take a look at Planche Progression Tutorials on Youtube or other blogs, you might come across something that looks a little like this:

In this clip I go over the basic planche progressions - ones you’ll likely see in many other tutorials. But the gaps between each of these progressions is very big, in my opinion.
Progressions in the traditional planche approach:
Tuck planche
Advanced tuck planche
Half-Lay planche
1 leg/Straddle planche
Full Planche
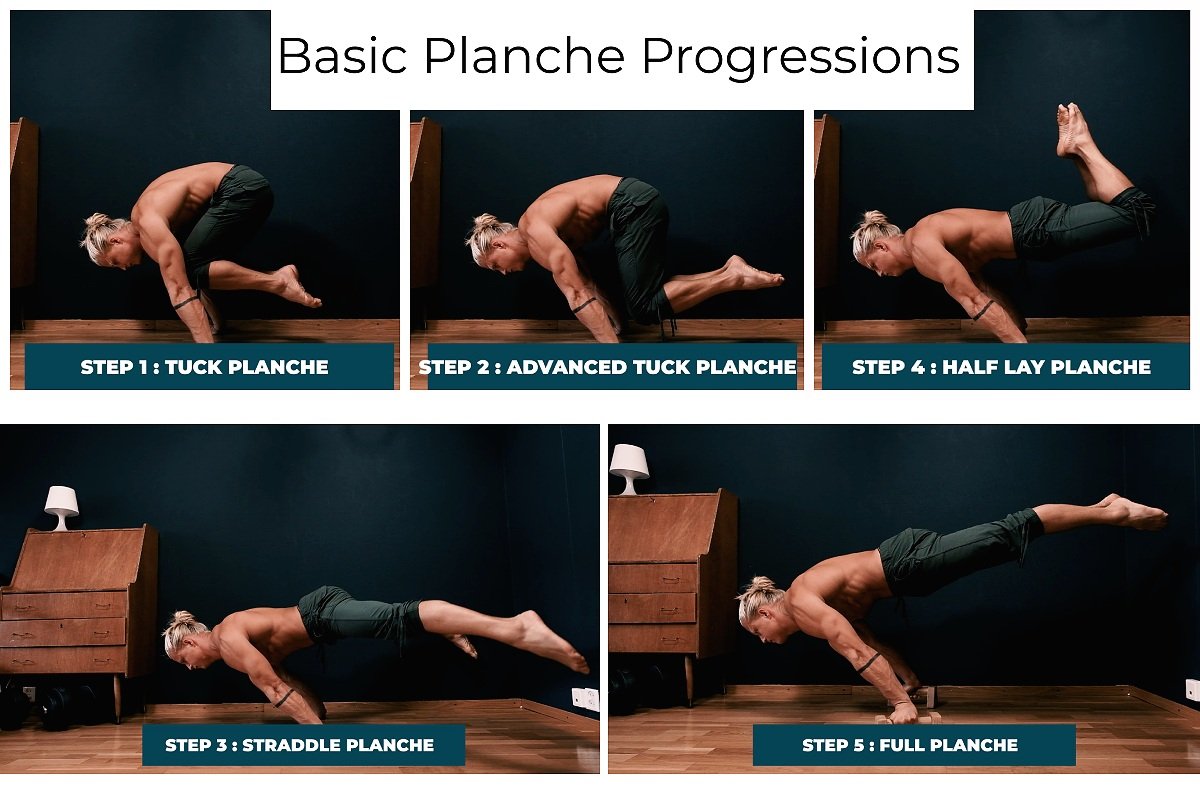
The traditional planche approach presented in most tutorials. The steps between all of these is for the majority of people too big and intermediate steps is needed.
It might look straightforward at first, but in my opinion, there could be 1,2, or even 3 progressions between each of these progressions. Jumping from Advanced Tuck Planche, to the Straddle Planche, for example, is such a huge step. The average person training their planche has no business going straight from the Advanced Tuck Planche to the Straddle Planche and should really include steps in between these two progressions.
One thing that I think is helpful in reducing the intensity of the progressions is to take half steps between each progression, by doing the next progression up with one leg.

In this clip I go over the ‘lost planche progressions’. How to make the step from one main progression to the next a little easier.
For example: instead of going from the Tuck Planche to the Advanced Tuck Planche, it is possible to go from the Tuck Planche to a One-Legged Advanced Tuck Planche. If you’re able to do the Tuck Planche, but you are finding the Advanced Tuck Planche to be too difficult, for example, trying the One-Legged Advanced Tuck Planche could offer a path forward. Doing things this way, you can smoothly build the strength that’s required to take the full step from one progression to the next. The same trick can be applied again, for example, when going from the Advanced Tuck Planche to the Half Lay Planche.
If you want some help with structuring your planche training, be sure to check out my calisthenics training app.
The training app has workouts and programs for both the planche as well as other calisthenics skills.

Instead of going directly from tuck planche to advanced tuck planche, consider doing an intermediate step- one leg advanced tuck planche.
One thing to keep in mind when doing progressions one legged is to alternate sides.
The best planche progression - Open half lay planche
If someone where to ask me:
“what is the best planche progression?”
My answer would be a definite:
“The open half lay planche!”
This is why…
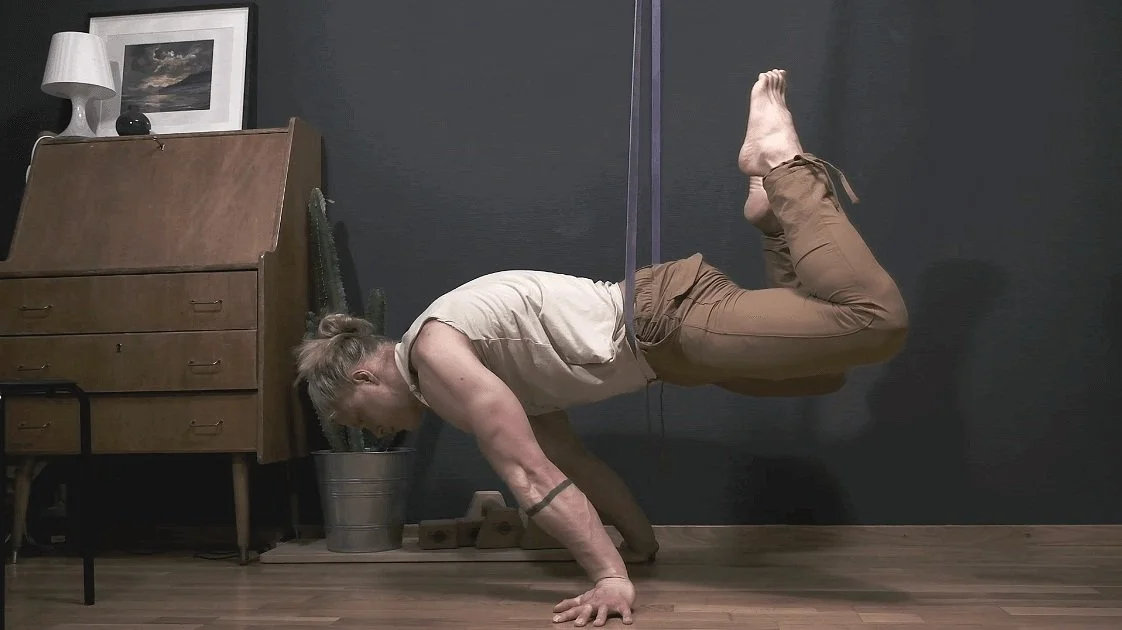
It is truly an invaluable in progressing towards your full planche. It is the easiest progression in which you are extending both of your hips - similar to what you would be doing in the full planche - so I highly recommend you get as much time as possible working on this progression.
It is a very advanced progression indeed, but you can cheat your way to it, without sacrificing it valuable lessons - by using a rubber band assisted open half lay planche progressions, which I will get back to.
The positional awareness you gain while in this position will carry over well to both the straddle and the full planche, yet it is significantly easier than both. You will build your core strength, as well as awareness in your hips for them to be in the correct position. As well, you will build the elbow and shoulder strength needed to eventually perform the straddle planche, and then the full planche. Getting to the Open Half Lay Planche and working on it as much as possible will help you achieve the full planche much quicker.

Try to get to the open half lay planche as quickly as possible, even if a resistance band is needed at first! This planche exercise is the best and most relevant exercise for any planche variation with extended hips (read straddle and full planche)
2. Training the planche with resistance bands (rubber bands)
Another thing I’d like to note regarding planche training is the use of resistance bands (rubber bands). Resistance bands are very helpful and are another thing that can be used as an intermediate step between progressions.
Using resistance bands (rubber bands) is another way of adding steps between progressions. Here is an example of the Band Assisted Half-Lay Planche
Resistance bands are helpful in reducing your risk of injury; for taking pressure off of your wrists - I could go on and on about the benefits of incorporating resistance bands. So do please consider using them as well. Learning how to use resistance bands can take time and is almost a skill all on its own. However, I believe it is worth investing your time in learning how to use them, as they are a valuable training tool. If you’d like me to make a tutorial on how to use resistance bands, please drop a comment below and, depending on the interest, I will be glad to put one together for you.
Planche Program
I’ve created a module specifically for training the Planche which can be found and used on my app, and within that module is every single step as well as full workout programs designed to strengthen your body specifically for the planche. For something as difficult as the planche, you really need to commit to the work. I truly believe in the programs and modules I’ve created, and I’m confident that arming yourself with this laid-out plan and following it as best as you can will lead you to success.
3. Dynamic planche repetitions:
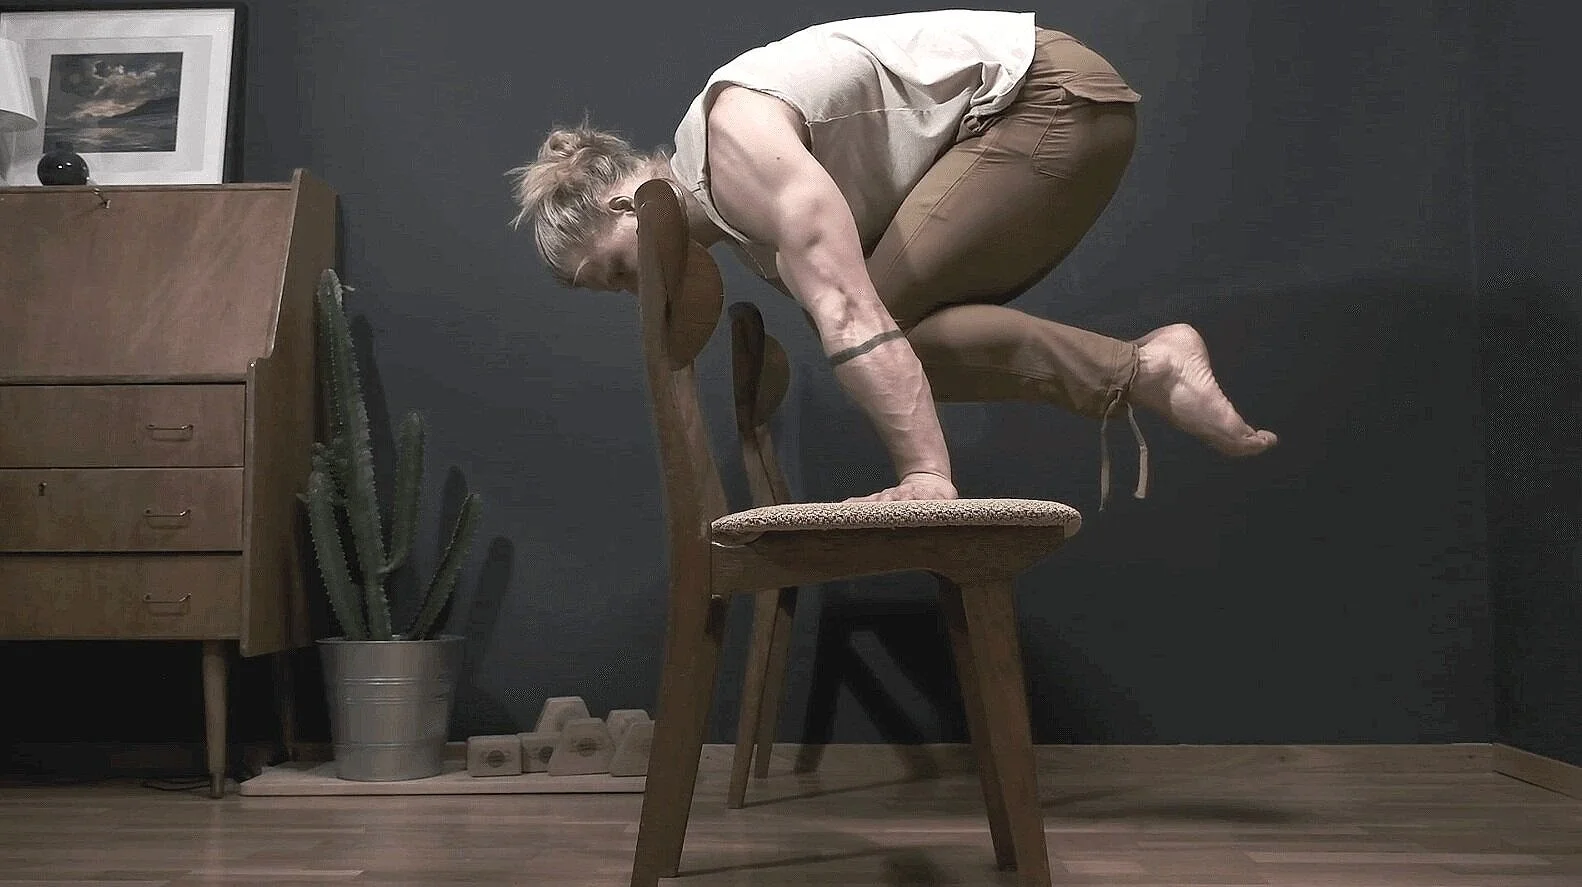
Dynamic planche repetitions, for example the Tuck Press Planche, are another valuable asset on your planche journey because they help you develop strength in a different way - especially in building excess strength.

The Tuck Planche low press.
Tuck planche exercises are in and of themselves a pretty impressive skill to be able to perform and are a great way of incorporating different combinations into your training, and having some kind of movement ‘play’.
Even getting to the tuck planche is no cake walk, however. There are many exercises you can do to build up to this progression. For example: pike negatives to tuck planche, negative tuck planches, elephant stand press to handstand, negative handstands, straight arm press, negative handstand to elephant.
Tuck Planche Swing Ups
In addition to the dynamic planche variations - especially the tuck planche press - helping you on your way to achieving the planche, these exercises are highly relevant to other movements as well. For example, down the road, the strength gained from your planche exercises will carry over well when learning your Press to Handstand.
4. Training planche core strength
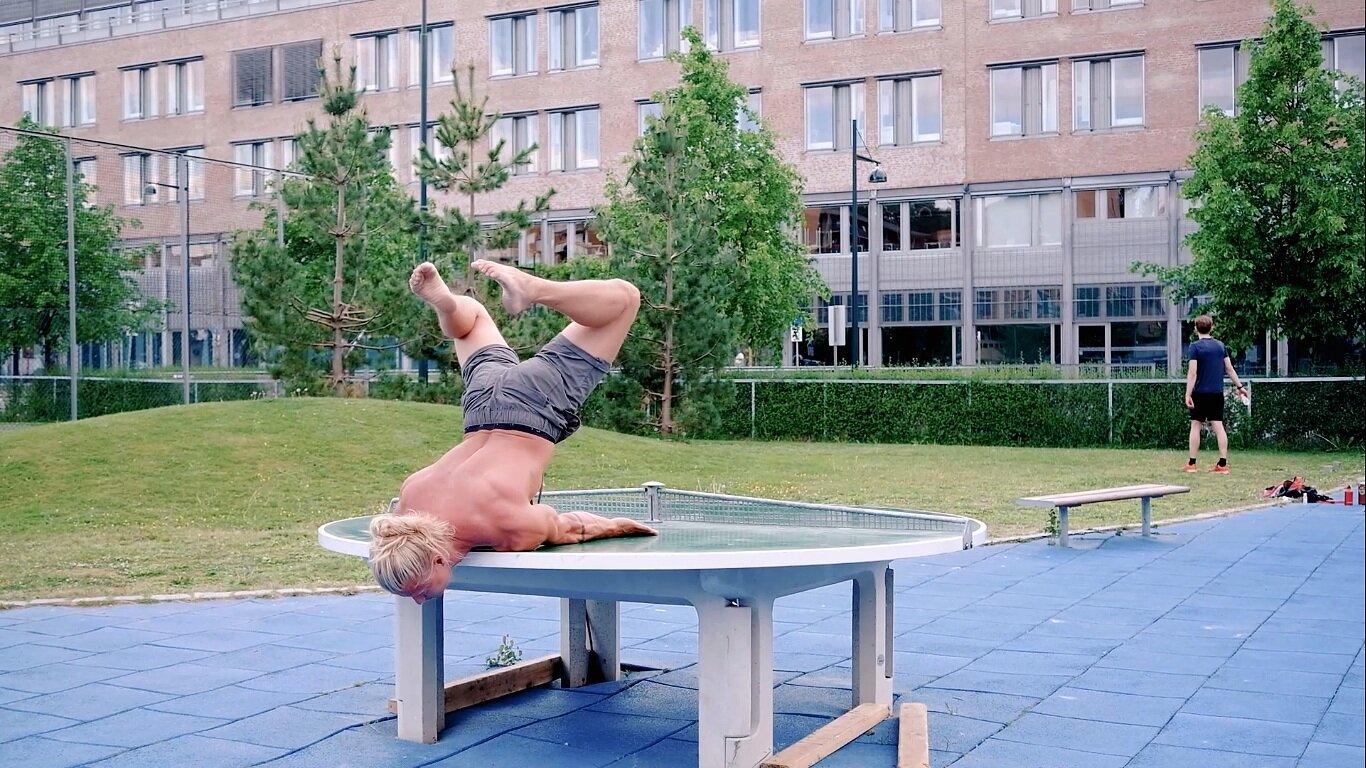
If you are heavier, longer, or have a lower center of gravity, i.e. a heavier lower body, isolating your core for strengthening will be helpful. One exercise that I find to be particularly helpful for this is called the Assisted Maltese Press.

In the Assisted Maltese Press You will start laying prone on the table, and try to bring your legs and body up. This exercise will strengthen your upper spinal extensors.
At first with the Assisted Maltese Press you will likely not be able to go all the way up and down - that is to be expected. Try to lift your body up and then lower it only as much as you are comfortable with. From there you can continue to build up to a stronger and stronger point. It’s particularly important with this exercise that you try to activate and use the upper part of your spinal extensor muscles.

The Upper Spine Extensor is what you will need to train and activate in the Assisted Maltese Press. Strengthening these muscles will help greatly in achieving the Full Planche.
If at first it is too difficult to perform the exercise with your legs straight out, you can bend your legs at the knees and reduce the load that your spinal extensors need to lift. Another way to increase/decrease the difficulty of this exercise is by shifting your body further onto/off of the surface you are laying on. As you can see in the photos above and below, I’ve managed to make great use of this ping pong table ;). To make the exercise easier, I would bring the edge of the table closer to my belly button/put more of my body off the ping pong table. To make it more difficult, I would let more of my body lay on the table, with the edge of the table going further and further up my torso toward my neck.

In this clip I go over the assisted maltese press and its variations.
Some things to keep in mind when performing this exercise: emphasize the protraction of your shoulders by bringing them together in the front, and also emphasize the upper part of your spine by flexing it. Finally you want to depress your shoulders to stabilize the position. When you are doing repetitions of these Assisted Maltese Planche Presses, try to get the feeling that you are actually lifting the lower part of your body with the upper part of your spine extensor muscles when you are performing this exercise.
I recommend you start the Assisted Maltese Planche Press at the Open Half Lay variation -that is, with both hips straight, open legs and knees bent/your feet towards your glutes - and that you do incomplete sets at first. This means you will start with your legs all the way up and bring them down as much as you can, then return to the start position.
Assisted Maltese Press in the Open Half Lay position
Conclusion
In this article we’ve gone over some factors that may be unique to you that you should keep in mind when approaching the planche; as well as different tricks to use in approaching your planche training. We spoke about creating half-steps between progressions by performing movements one-legged; we briefly went over using resistance bands and how they are a helpful tool in connecting your progressions; we spoke about dynamic planche repetitions; and finally we spoke about targeting your core strength with the Assisted Maltese Planche Press and its variations.
I hope this has helped give you some ideas on how to attack the planche from different angles. However, if you would like a complete and structured guide, with step by step progressions, each with video and written instructions, then you will want to head over to my app.
Happy planching movers!
Share this Article