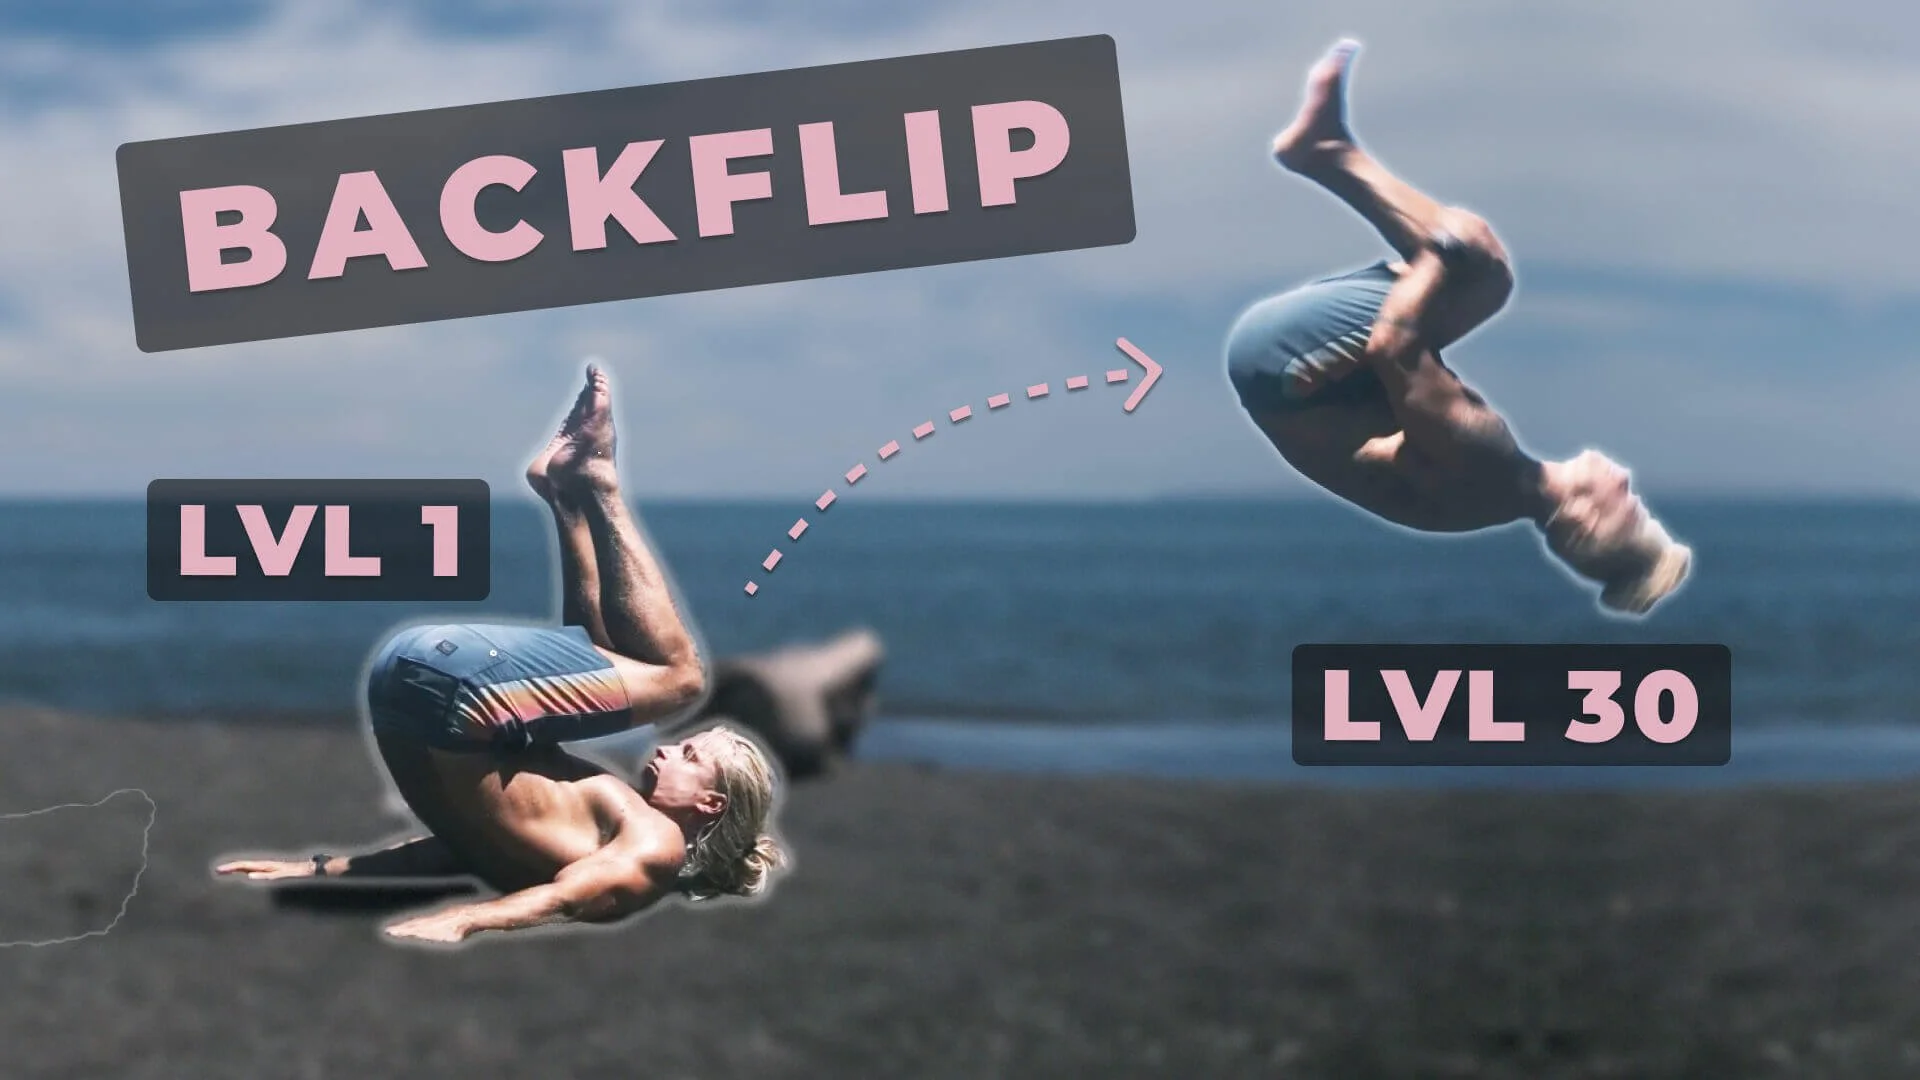
How to Backflip - WITHOUT a gym!
The backflip is one of those things that a lot of us have wanted to learn since we were kids and - let’s face it - a lot of us continue to be kids our whole lives. In other words, whether you’re 10 years old or 35 years old, there’s a good chance that if you see someone doing a backflip, you think to yourself, “I wanna be able to do that”.
So! In this tutorial, myself and Theo are going to go over everyyyyything you need to learn to backflip, so that you can finally make your childhood backflip dreams come true.
The biggest issue for most people when it comes to learning a backflip is fear.
And how do we combat that fear? Simple! We must manifest our inner Steve-O, and just go for it.
Back Rolls
In all seriousness, we can combat our fear of backflips by starting off doing something much more manageable - a back roll - and slowly, surely, progressing through a series of drills and movements that look more and more like a backflip.
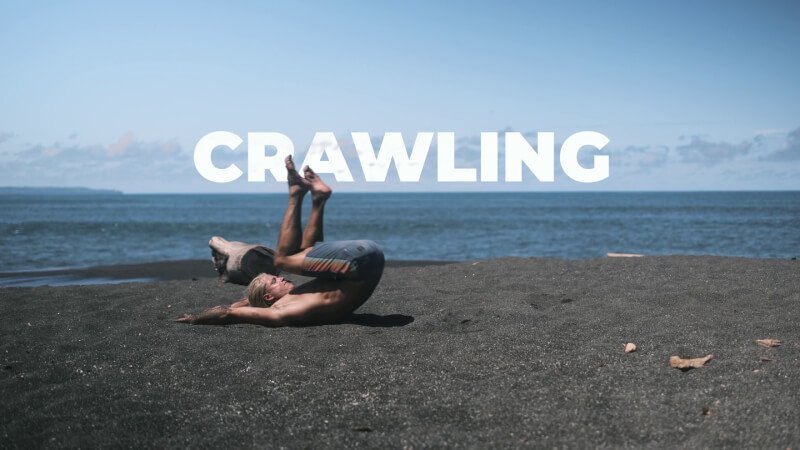
Remember, you’ve gotta crawl before you can walk or run :). The back flip starts with getting comfortable doing back rolls.
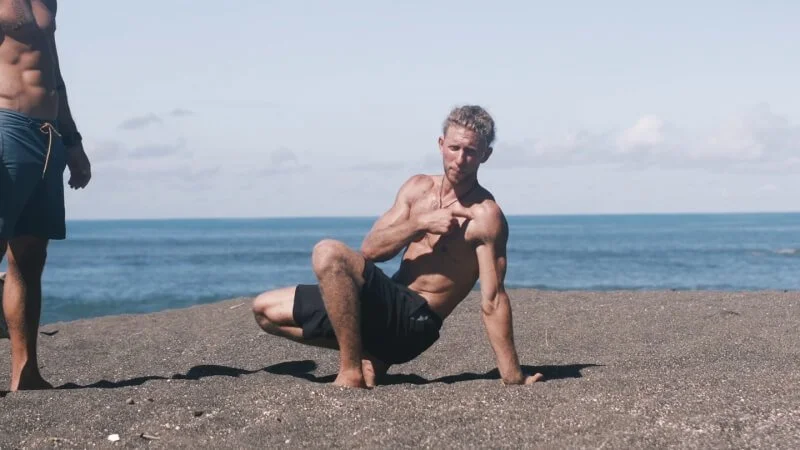
As mentioned, the first step on your backflip journey is the back roll. These help us in getting comfy with rotations. So, what you do is, rolling backwards, you pull your knees towards your chest. You can also angle your head to the side at the beginning to make it easier to roll backwards. You should also keep your head tucked in, and use your knees and core to create rotation.
How to do a back roll
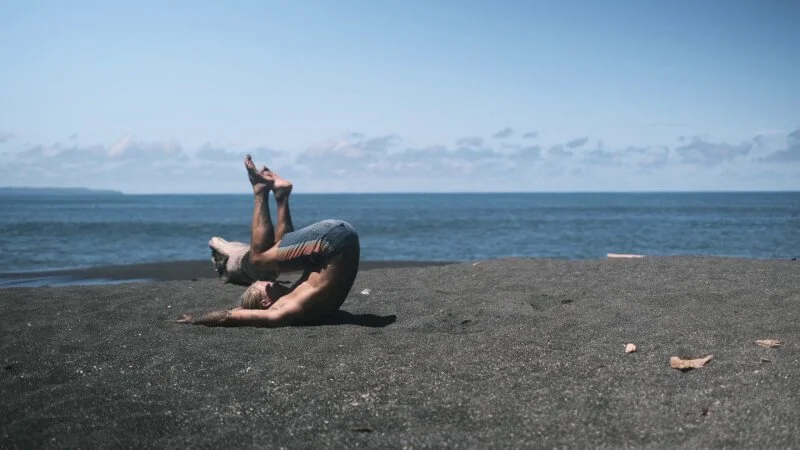
The next step after getting comfortable with back rolls, is to try and imagine doing a laying-down backflip.

For back rolls, imagine yourself doing a backflip - just laying down :)
Throw your arms up, keep your core tight, and throw your knees backwards. When you do it with momentum it goes sort of like an actual backflip, just laying down. If you want to make it more challenging, you can start with your arms already extended.
Tip: Straightening your legs can help get over the sticking point
To get closer to an actual backflip from here, the next step is to start in a standing position and to do the same back roll from that standing position.
As you get the hang of rolling on the ground, you want to get further up on the ground. This leads us to elevated back rolls. For elevated back rolls, you can use any elevated surface, such as your bed, a box or a chair. Or, you can use a partner!

After getting comfortable with back rolls on the ground, you will eventually progress to doing back rolls from an elevated surface
When using a partner, make sure their hips are shoulder height. One common mistake when trying the elevated back roll is to forget to use legs to create rotation.
Once you get comfortable with a partner-assisted elevated back roll, you can try with the partner’s body facing perpendicular to yours, so that you have less surface of their back to roll on. If you don’t have a partner, you can use a box → throw your hands up, your legs up, look for the ground and bring hands over

Partner-assisted back rolls
Again, you can use your bed, bars, rings, a sofa, or anything else that serves as an elevated surface to ‘get your reps in’ and start getting used to rolling backwards.
It’s worth mentioning again: the most common reason for backflip failure is freezing/fear. The best way to make sure this doesn’t happen is to get comfortable rolling backwards, and comfort rolling backwards is established by repetition.
The more you practice, the more you get used to it, the more you prevent injury.
Here is another back rolling drill to get comfortable turning around backwards: the back to back rollover. For this drill, the person who is doing the rolling, as well as the partner, are both active.
The partner needs to help by pulling the roller over their back and crunching forward. The roller needs to bring their knees towards their chest, spot the ground, and land on their feet.
Here is a summary of the progressions for elevated back rolls. One thing to note is that you should have already mastered doing back rolls on the ground before being at this stage. In my app you there is a full backflip program, and you can follow through every single progression until you have arrived at the backflip!
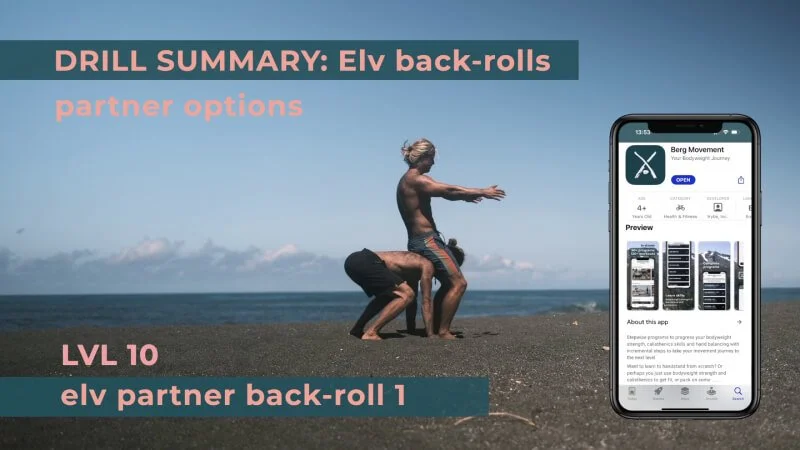
Here are all the drill progressions for the ‘elevated back roll’ stage of learning backflips. To follow every drill and progression from the beginning, you can head to my app and follow along:)
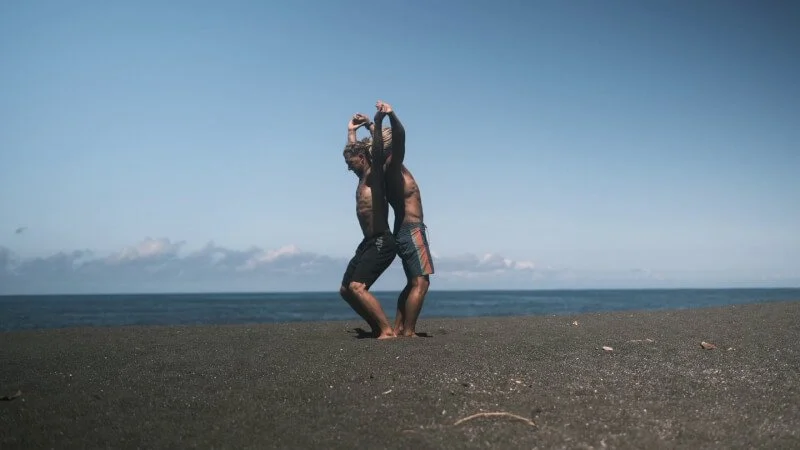
Learning the Macaco
Another great way to approach the backflip and to minimize fear, is to learn the macaco.
Watch Theo explain how to set yourself up to do a Macaco
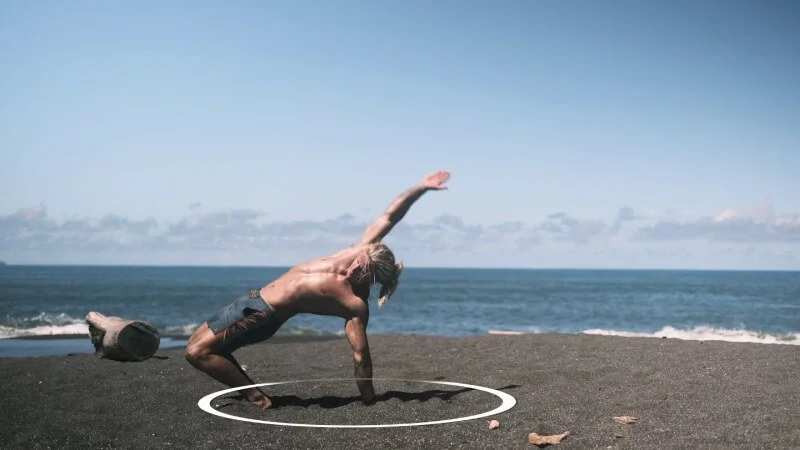
A macaco is basically a back handspring, where you’re starting with one hand already on the floor
First, you need to choose which side is more comfortable for putting your hand down on the ground.
What you want to do is start with one hand on the ground, throw your other arm up and jump backwards over the hand that is planted on the ground.
One way to train for the macaco is to ‘circle your hand’. The very first step is just to run around your hand, from the start position to the final position. Then make a small jump, each time further and further, in a circle, around your planted hand. The last ‘progression’ of the macaco would be to jump fully over your hand backwards.
‘circling’ your hand, a drill for learning the macaco
The bigger the jump you try to do, the more of an arm swing you will need from your free hand. Eventually you want to swing your arm straight backwards, which will give you the “full” macaco.
To build from the macaco towards a back handspring and eventually the backflip, you want to try to perform the macaco without the planted hand down yet. So, you’ll jump into the macaco and then put your hand down. Try to bring the macaco more and more vertical, so you are getting nearer and nearer to the look and feel of an actual backflip.
Actual backflipping
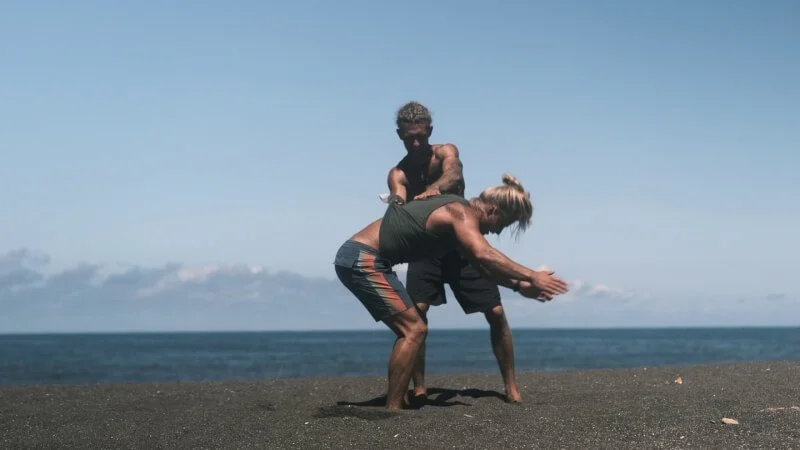
If you’re with a partner, there are a couple ways you could start to work on the actual backflip. The very first one is having your spotter lock his hands around your waist and lifting you, the flipper or practitioner. Then, you as the flipper will tuck your knees to your chest, spot landing, and finish the assisted backflip.

Looks fun, right? hah. To build some trust with your partner you can try this simple drill where you lock your arms around their body and help them flip around.
Another way to practice is what Theo and I call the “T shirt drill”:
For this one, the spotter wraps their hand all the way into the t-shirt of the flipper and makes sure it’s tight. The spotter having their hand in the flipper’s t-shirt will help in case the spotter or the flipper loses control.
The t-shirt drill
One important thing to keep in mind as the flipper/practitioner - if you want to continue to have a spotter - is to swing your arms in a straight line backwards, and not out to the side. Why? The spotter is to the side, and you’ll hit them in the face if you go sideways with your arm!

WRONG! Your spotter is your friend - don’t hit them in the face!
So, at the beginning, it might be best for the practitioner to actually start with their hands already up with each arm near to the ears, to be 100% sure you will not hit your spotter in the face.

Right :)
Then, as you practice more and get used to keeping your arms straight and near to your head, you can switch to starting with them by your sides and incorporating the full arm swing.
The spotter, who will have their hand wrapped in the practitioner’s shirt, can use their free hand to support the practitioner. The spotter may put their hand/arm in the hamstring area of the practitioner.
The next step after this is to take off your shirt - woohoo! - and start to try the backflip with slightly less support, albeit still with a spotter.
Now, for the spotter, the hand that was wrapped in the flipper’s t-shirt will now be placed on the lower back. The other hand will be in the same place as before, in the flipper’s hamstring area.

Spotter places one hand around the small of the practitioner’s back, and other behind the legs, at the hamstrings
It is important to note that the hand placed on the lower back is not meant to be there for static support only, but should also be used to help lift the flipper after they’ve jumped, to give them more time to complete their rotation.
When all of the above is something you’ve become comfortable with, it is time to really start practicing backflips! The safest way to do this is on a soft surface, like sand, mattresses, a foam pit, or a pool! Places with trampolines or bouldering/climbing centers with their big fat mats are also good places to start!

When you’re ready to start practicing actual backflips, find a soft surface, like a pool!
Common mistakes when doing the backflip:
Stopping with your arms before you reach the top of your arm swing
Starting to flip before you finish the jump. You should try to get tall and stretched out at the top of your jump,, with your arms extended, and really start your flip, before you tuck. If you don’t, you won’t get any rotation. To eliminate the chance of this happening at the beginning, you can try the backflip with your hands already raised. Doing this will also allow your arms to brace your fall if you do not rotate enough.

drill summary for the final stage of learning the backflip
Some additional tips for learning the backflip:
Improve your vertical jump.
Improving your vertical jump will make learning the backflip easier. You can improve your vertical jump through strength training exercises, such as resistance band jumps or other strength building exercises for the legs.

Get your vertical jump game strong to help your backflip progress! :)
Strengthen your core.
Strengthening your core will also make learning the backflip easier. Part of the backflip is tucking your legs in, and to do that, you use your core. So exercises which strengthen your core, such as hanging leg raises, will help.
Summary
Let’s summarize all that! How to backflip?
Learn the back roll. Start with back rolls on the ground, then move on to elevated back rolls.
Become comfortable with the macaco
Progress through different levels of partner-assisted backflips.
Start trying backflips on soft surfaces.
Build Core strength and improve your vertical jump
Alllllll of that being said, I think you now have the tools you need to get started on your backflip journey! If you’d like an even more regimented and detailed approach to it, though, please feel free to work through my backflip-dedicated program. If you’ve got any more questions or want to share your progress, hit me up on IG or Youtube and I’ll do my best to get back to you.