How to Press Handstand - are you making these mistakes?
Sure, a handstand looks pretty cool. But if you’ve already got the handstand down, why not challenge yourself and make the entry look badass too? The Press to Handstand is a classical bodyweight movement in that it requires strength, mobility, and technique/balance. In this tutorial I will cover how to Press Handstand, approaching it from these three angles.
Check out the full press to handstand tutorial on my YouTube channel
Press to Handstand Video Tutorial - Table of Contents:
What is a press to handstand: introduction - 0:32-1:00
Press to handstand Biomechanics - 2:00-3:00
Common press to handstand mistakes & general tips - 3:00-5:20
Mobility + ‘compression strength’ for the press handstand - 5:20-7:10
Strength needed for the press: 7:15-8:50
press to handstand Technique: 8:50-11:20
Elevated press to handstand: 11:20-12:30
Useful drill - Straddle Jump ups: 12:30-13:10
Summary: 13:15-14:48
What is required for the handstand press?
In order to do the press to handstand, your hips need to get over your hands, so that your feet can lift off the ground.
To get your hips over your hands, you will need to be able to:
fold forward very much, which will require a lot of flexibility; or
you will need to be able to lean forward very much, which will require a lot of strength in your shoulders; or
a mix of the above
Rather than relying solely on flexibility or strength, then, it is best to approach the Press Handstand using a combination of the first two factors.
Another thing to keep in mind regarding technique and positioning with the Press to Handstand, is to push/round your back out. This compresses your body and makes it shorter, so that your legs get longer! Once you gain awareness in your back and are able to push it out, this will help get your hips over your hands more easily, and so make the whole movement easier. (schema FAQ how do I arch/round my back?) To gain more awareness in your back so that you are able to push it out when doing the Press to Handstand, you can try exercises like the cat camel.
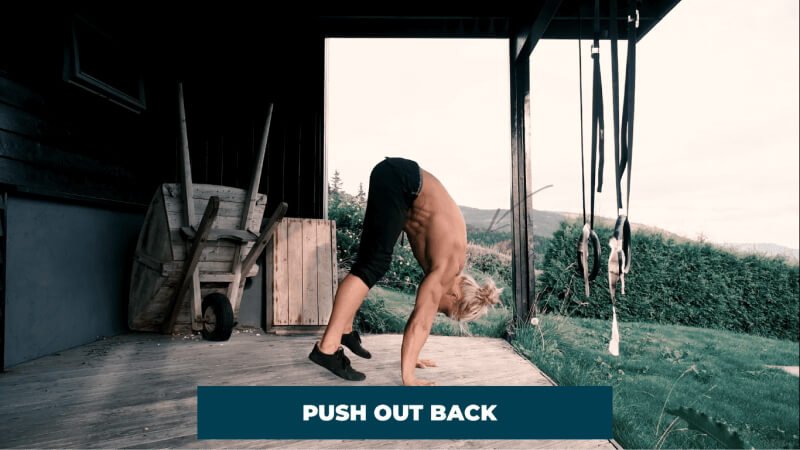
Pushing your back out compresses your body and makes your legs “longer”. This makes the press to handstand easier for you
Common Handstand press mistakes:
Not paying attention to how your pelvis is tilted. More specifically - thinking you need an anterior pelvic tilt through the whole move.
The biomechanical terms we use are the terms anterior pelvic tilt and posterior pelvic tilt, but you can just think of it as: anterior pelvic tilt is like arching your back/sticking your butt out, and posterior pelvic tilt is like flattening your lower back/tucking your butt in.
While doing the press to handstand, you should try to focus on employing a posterior pelvic tilt in the first part of the move, when compressing legs towards body. Then as your legs lift off the ground you need to pull your ass over your hands and shoulders into a posterior pelvic tilt.
Thinking the shoulders need to be extended all the way through the Press to Handstand (see photo below). This will be very difficult. To do this you will need super long legs and to be super flexible. Even professional hand balancers lean forwards a bit in their shoulders.

You do not need to have your shoulders be like this when doing the Press to Handstand
As mentioned above, then, the best approach to entering the Press Handstand is to work on mobility but also to allow a bit of a forward lean in the shoulders. To do this you will need quite a bit of shoulder strength. What is the best way to train your shoulder strength for this movement? To train like you are working towards the planche - specifically, training the Tuck Planche.

Training the Tuck Planche will improve your Press to Handstand strength!
Mobility drills for the Press to Handstand
You will indeed need some level of flexibility to do the Press to Handstand. Here are a few exercises I recommend for attaining the required flexibility for doing this movement:
1. The pancake stretch: to do the pancake stretch you simply open your legs and try to lean forward between them.

the pancake stretch
2. To gain active flexibility in your hip flexors and quads: place your hands directly in front of your groin while in the same starting position as the pancake stretch, and bring your legs up and down. You can also rock back and forth and go into a kind of straddle L sit.
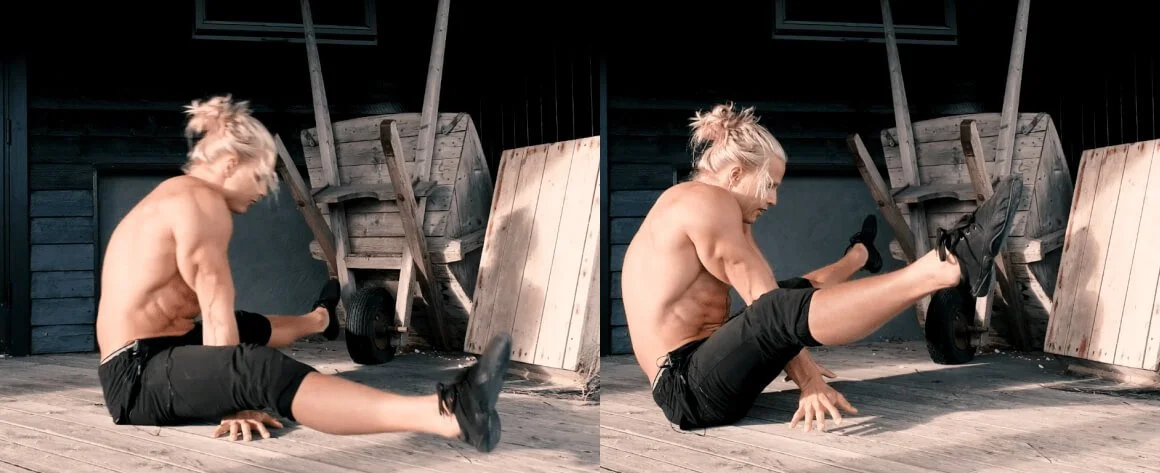
Gaining mobility using active compression
3. Press walks: Press walks train the very beginning of the entry to the Press to Handstand. To do them, you lean forward enough to let the weight come into your shoulders and off your feet.

The press walk - a great progression for the press to handstand
Briefly allow your feet to come off the ground and bring them forward a ‘step’. If this is too difficult at first, which it likely will be, you can walk with one foot at a time.
Strength for the Press to Handstand
To reiterate, planche strength is very relevant for the Press to Handstand. Therefore, you can kill two birds with one stone and consider planche training as strength training for your Press to Handstand :).

Check out my calisthenics, handstand and movement training app for press to handstand program as well as complete bodyweight strength and handstand programs.
A Tuck Press to Handstand is something that is a relatively achievable goal and training for it will also be a fantastic way of training for the Press to Handstand.

Learning the tuck planche press is perhaps the best way of gaining the strength needed for handstand press
Of course, the Tuck Planche itself is something that you may need some time to train towards. If this is the case, note that in my app I’ve got a program specifically laid out for training the tuck planche and beyond :). How to Tuck Planche? Check this clip out for some helpful exercises:

Press to Handstand Technique
For sure, before adding the ‘Press’ part of the Press to Handstand, you will already need to have the ‘Handstand’ part down pat. Once you’ve got a handstand down, the next step might be to get comfortable doing a tuck while in a handstand, then returning to a regular handstand, aka Tuck Ups.
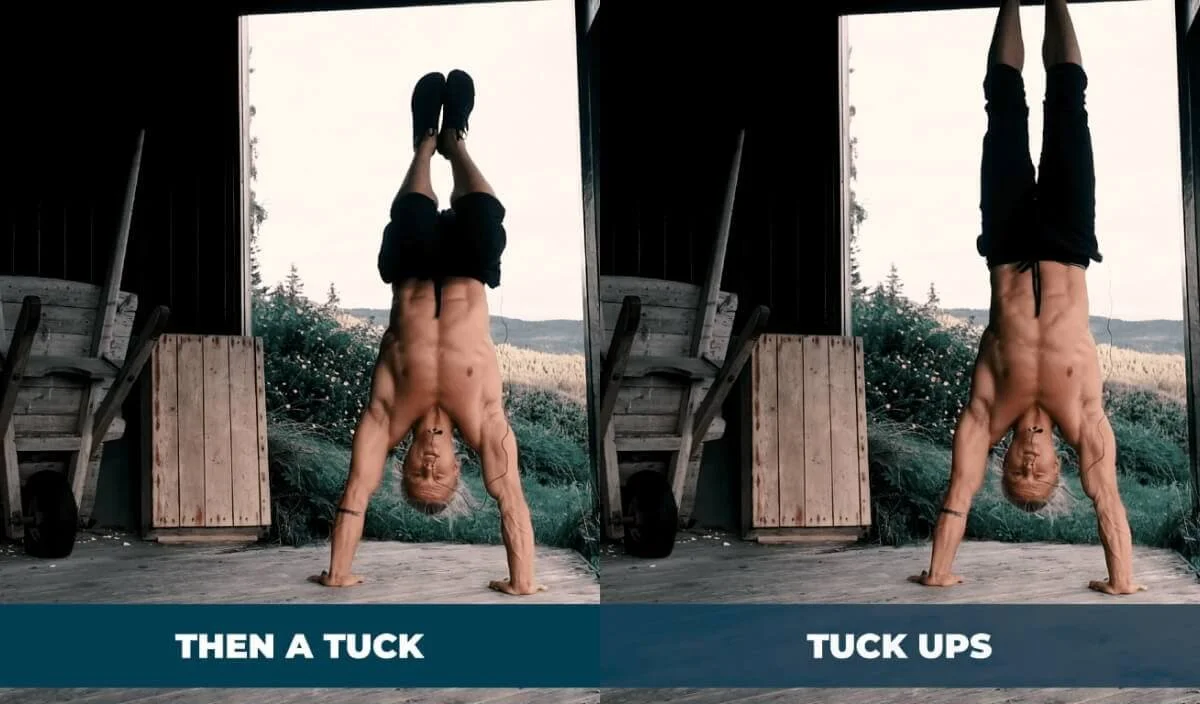
Check the clip out to see what tuck ups look like
Another helpful thing to get comfortable doing would be Straddle ups. With Straddle Ups, you are opening your legs as if attempting to do the splits, while in the handstand, and then bringing your legs back together.
What the Tuck ups and Straddle ups are doing is learning to control your legs and pelvis position.
Another technical aspect you need to train and be aware of is pulling using your spine extensors.
From this point: (toes on ground),

First part of the press to handstand has a posterior pelvic tilt and a rounded back.
To this point:(legs lifted off),
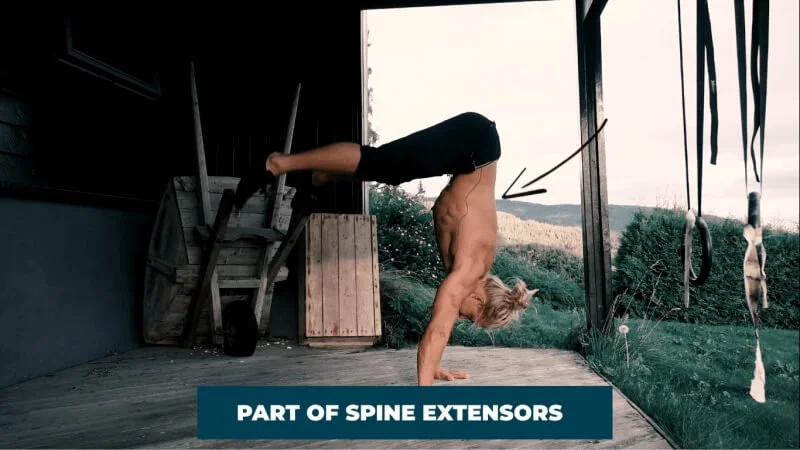
Second part of the press to handstand has an anterior pelvic tilt and a slight arch in the back.
you are using your spine extensors to not pull your legs off of the ground, but your butt over your hands and shoulders .
Training using elevated Press to Handstand
Training the Press to Handstand only from an elevated position is not a good idea. However, mixing it into your training along with everything else can indeed be helpful. What you can do, is use the elevated press to handstand to enter the handstand, and then come all the way down, to train the Press to Handstand as a sort of ‘negative rep’. Once you are at the entry point to the Press to Handstand after completing the ‘negative’, you can try to do a mini Press to Handstand entry by jumping your feet back up onto your elevated surface(a chair for example), and performing the rep again.

Using an elevated surface for press to handstand sometimes - not all the time, can be helpful.
Another super useful technique for training the Press to Handstand is doing Straddle Jump ups. With Straddle Jump Ups you start with your hands on the ground with split legs, and you jump up to a straddle handstand.

Straddle jump ups are a great drill/progression for the press to handstand
As you get more and more comfortable with this, you can try to lower your feet back down to the ground as slowly as possible, turning the exercise into more of a negative Press to Handstand. As well, you can try to jump less, making the Straddle Jump Up more and more like a Press to Handstand.
Conclusion - How to press handstand
Let’s summarize everything. How to Press to Handstand?
Train the Press to Handstand using a mixed approach of mobility and strength in your shoulders.
Gain awareness in your back and push your back out/ to compress your body and lengthen your legs.
Gain positional awareness in your hips and pelvis by training Tuck ups and Straddle ups. Include other technical drills in your training such as Press Walks, Pike negatives to tuck planche, Pike handstand negatives, and others mentioned above. If you have no idea what these exercises are and want to learn how to do all of them in a stepwise program that’s already laid out - again - you can check out my app :).
Build strength using planche training techniques, specifically the Tuck Planche and its related exercises.
Use an elevated surface to enter the Press to Handstand easier. Come down to the starting position of the Press to Handstand with your feet on the ground slowly, making this dynamic exercise a kind of ‘negative rep’ for the Press to Handstand.
Please feel free to comment any questions or feedback you may have here on the blog, on my youtube video, or on my IG page. Looking forward to hearing from you and hope the Press to Handstand training goes well! Take care movers :)
Share this post!