One Arm Handstand - Drills and Progressions when starting out
Movers! Welcome back.
In this piece - the second part of a series focusing on the One Arm Handstand - I’m going to delve deeper into the One Arm Handstand. In my first piece on the One Arm Handstand, I covered some form cues and tips that I think you should prioritize in your training. In particular, I went over the shape I’d recommend you try to aim for when learning the One Arm Handstand, i.e. 1) having an anterior pelvic tilt, 2) having straddled legs, and 3) pushing out your shoulders. Today, I’m going to get into how I think you should really start your OAHS journey - what exercises you should do, what drills you should do, and things to keep in mind, especially when starting your One Arm Handstand journey. Let’s get into it!
Check the full youtube video out here for a visual on everything we discuss in this article
Learn how to handstand Lean
Before we get started on learning to lean, a friendly reminder:
avoid ego lifting.
What I mean by this in regards to the OAHS, is rushing into leaning fully onto one hand and hoping for the best. Doing this, in my opinion, is one of the most devastating things you can do to your handstand progress. It is completely unproductive. So, stop doing it! :) Every once in a while you can just go for it, but for the most part it’s best to avoid this practice.
Now we’ve got that out of the way… what exactly is ‘learning to lean?” Leaning is simply tilting our hips to either side, which puts more weight on one hand.

Check this video out for a quick 25 second visual demonstration on what I mean by ‘leaning’ :)
While tilting our hips, we focus on keeping our shoulders in the exact same position.
We also want to keep our hips in position, even while leaning. While in the handstand position, it’s helpful to think about trying to push your feet towards the ground, to lock in a tight straddle.
Again, keep it tight! In your hips, and in your shoulders, be mindful to try and not let things start to rotate or tilt out of place, as this will eventually lead to you coming fully out of the handstand.

It’s already important to keep things tight with a two-armed handstand. With the one-armed handstand, even more so. Otherwise you will quickly rotate out of place. This includes keeping your shoulders and hips where they should be.
Eventually, we want to get comfortable enough with our leans, that we are able to put more weight onto the side we are leaning to, and elevate the palm of the opposite hand, taking more and more weight off of that side.
Warning: the following form cue tip includes butt cracks. You’ll just have to trust me on this one.
Whenever you are leaning, one way to ensure your form is correct is to try to keep a straight line between your butt crack and your lower spine. When you lean, you don’t want that line to become curved.
So, remember: “spine, in line, with butt crack.” You can try to work on this form cue, using your best friend the wall, and film yourself to connect what you’re doing to what you’re feeling, as well as try to make the needed adjustments.
If you wanna know more about butt cracks, being in line with spines, check this clip out
Using the Wall for one arm handstands
This is something I have spoken about since my very first handstand video and will continue to talk about again and again:

It’s true! Almost since my very first handstand video, I’ve tried to convince you how good my app is. It really is! Check it out :)
USE THE WALL!
Here are some things I think you should keep in mind when using the wall:
-Use the straddle position. One thing about using the straddle position when you are using the wall is that you need to find the perfect distance away from the wall, so that your toes are barely touching the wall. This way, you are mostly balancing on your own strength, but the wall is there in case you need it.
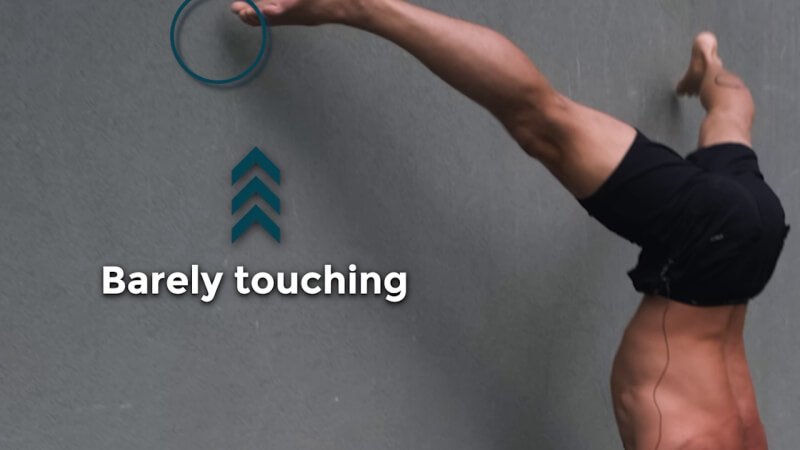
When using the wall you need to find the perfect distance away from it for you. You also need to keep in mind that the wall is not there to fully support you, therefore your toes should not be relying heavily on the wall. Rather, they should barely be touching it.
-When trying to find the best distance from the wall, remember: we’re all different! You will likely have a different ‘perfect distance’ away from the wall than your friend or another youtuber trying to teach you the OAHS. Find your perfect distance.
-In contrast to the wall I’m using in my video, you will be better off using a slippery wall, with slippery socks. A wall that will cause a lot of friction between itself and your feet is not ideal.
One of the best things about the wall is that it gives us the mental space to focus on things we haven’t turned into a habit yet, whether it be something to do with our entry, hips, shoulders, etc. With the wall we can focus singularly on these things, as we don’t have to worry about simply not falling.
OAHS Entry Drills
The first set of drills you should focus on when trying to learn the One Arm Handstand is entry drills. And by entries, I mean how you lean into the OAHS.

Some examples of OAHS entries and how they look
Here is a progression you can follow for OAHS entries/leans:
Straddle downs
Small shifts
Lean more weight onto one hand + start to lift up the opposite hand → what I call first knuckle shifts
Lean more → fingertip shifts
Controlled side walks

6. Block walks. With block walks, you have to emphasize the shoulder push a lot more when you are walking up to the block. Be sure to train this both ways.

7. Eventually you can try a three finger lean, then a two finger lean, and finally a one finger lean.
The point of these drills is to put more and more weight onto your working arm, using less and less fingers on the other arm.
An important thing to keep in mind is that you should be doing all of these drills for reps!
Drills for OAH: Freestanding Holds

You’ll see many of the OAHS hold drills match the drills we went over above in entries. The difference here is that we are now focusing on building ‘time under balance’. Ideally, you’ll be able to hold each progression for 20-30 seconds before moving onto the next.
One of the most important concepts to adopt here regarding freestanding holds is “time under balance”.
First knuckle holds. Rather than the first knuckle shifts we learned in entries, at this stage we are going to working first knuckle holds. And remember, we want to build ‘time under balance’ with these first knuckle holds. Work your way up to being able to hold for 20-30 seconds, and then move on to the next drill.
Fingertip assisted holds.
Three finger assisted hold
Two finger assisted hold
One finger assisted hold
Straight arm one finger assisted

The one finger assisted hold. Check the clip above for a visual on the others!
Again, for all of these, we want to build - say it nice and loud, all together - ttttimeeee undderrrr balaaance :)

Time under balance is a crucial theme, as you might have caught on to :)
As with the entry drills, use the wall! Using the wall with the hold drills allows you to build endurance and strength, as well as focus on different aspects of your OAHS position such as your shoulder elevation and keeping your hips tight.
If you are always just slightly touching the wall, you’ll have a better idea of where you are, and you won’t be at risk of rotating out of position.
Learning the straddle handstand
As well as using the wall for the entry drills, as well as the freestanding hold drills, at the very beginning of your OAHS journey you may want to use the wall to develop a strong straddle.

To get the best straddle possible, think about trying to bring your feet to the ground.
When learning the straddle and using the wall, you want to put your back to the wall. While in the straddle, you want to be close enough to the wall that you can push your butt away from the wall, or allow it to go back into the wall, using either your fingers(push butt away from the wall) or your hand heel(push butt into wall).
To develop strength in the straddle, you can try doing a drill I call back to wall, butt to wall. This drill will help improve your shoulder flexion as well as your strength in the straddle position. Take a look :)

Back-to-butt-to-wall: a helpful drill for improving your straddle as well as improving your shoulder flexion :) check it out
Summary
Folks, we covered a lot in this article, and I hope that you can take at least something from it that helps you progress in your One Arm Handstand journey. Let’s quickly recap:
How to get started on One Arm Handstand:
Learn how to lean
Work on entry drills
Work on hold drills
Improve your straddle
The golden tip: use the wall!
Again, I really hope you found something useful in this piece. If you haven’t checked out my app yet and are looking for that extra help, that extra piece of motivation, as well as structure and routine and world class program-making, please help yourself and check it out :)
Much love and see you all soon!